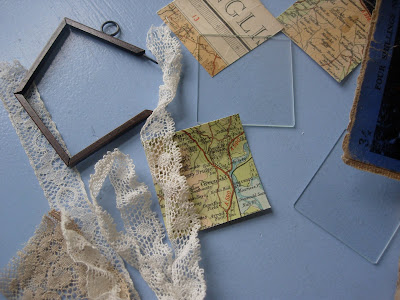
: vintage map pendant tutorial :

materials:
one memory frame
http://www.craftydevilspapercraft.co.uk/crafts/5168-inkessentials-memory-frames-1-1234-x-1-1234.aspkessentials-memory-frames-1-1234-x-1-1234.asp
a pair of glass inserts
http://www.craftydevilspapercraft.co.uk/crafts/1684-inkssentials-memory-glass.asp684-inkssentials-memory-glass.asp
dry transfer lettering
http://www.amazon.co.uk/Rubdown-Lettering-A5-Helvetica-Black/dp/B0027J3TPU/ref=sr_1_13?ie=UTF8&qid=1315598975&sr=8-13down-Lettering-A5-Helvetica-Black/dp/B0027J3TPU/ref=sr_1_13?ie=UTF8&qid=1315598975&sr=8-13
vintage map - the map i used was a vintage cloth backed map, if using plain paper
you may need to reinforce the paper before stitching on it.
vintage lace - if using modern lace you could age it by tea dying it.
needle and thread
instructions:

step one: using one of the glass slides as a guide choose
an interesting section of map and cut out using a sharp knife.
an interesting section of map and cut out using a sharp knife.


step two: choose some lace and sew to map section - i used a ruby red cotton
and added cross-stitches to the inside edge.

step three: using dry transfer lettering add a message
and added cross-stitches to the inside edge.

step three: using dry transfer lettering add a message
step five: sandwich collage between glass slides and insert into frame

step six: choose lace,ribbon,cord or chain for your pendant
or alternatively attach a ribbon and pin to wear it like a medal.
or alternatively attach a ribbon and pin to wear it like a medal.

optional step:
i really liked seeing the back of the stitching so i didn't hide this part but you could cover the back of your work or add an extra message.
i really liked seeing the back of the stitching so i didn't hide this part but you could cover the back of your work or add an extra message.
notes: make sure your collage is not getting too thick - it needs to fit between the glass sides and into the memory frame!
*******
This tutorial was previously published in
Issue One of the Crafter...oo Magazine
it is still available to buy here
as is the new and exciting Issue Two for just £1.50


2 comments:
This is stunning! Thanks so much for showing how you made it. Now to find some maps... :-)
Very thougghtful blog
Post a Comment